A Paper Mario Challenge Runner’s review of Bug Fables’ combat

SPOILER WARNING: This review contains spoilers! Don’t read further if you haven’t played the game! I just had a great idea: go play it right now, then come back and read this! Seriously, go play it.

As one of the best in the Paper Mario challenge running business, I’d had my eye on Bug Fables for a while. Once people from my community really started getting into it and recommending I stream it, I decided to take the plunge and wound up playing a very impressive spiritual successor to the first two entries in the Paper Mario series. I liked the story and the characters; honestly, I thought they were better then any Paper Mario game. The music is good, the art is fine, the side quests are great — bottom line: If you’re a fan of Paper Mario, you’re doing yourself a disservice NOT playing this game.

But that’s not what this review is about. This is a review of the game’s combat in regards to challenge running potential and high-level game play. I highly suggest you go play the game first before you read this (or at least have some idea of the medals) because some of these strategies will likely spoil you.

As a disclaimer: when I first started the game, my entire chat told me “Hey, equip the Hard Mode medal, it’s the way the developers intended you to play the game”. If that’s how they wanted it to be played, then I had no choice to oblige. This review is about combat with that medal equipped at all times.

Let’s go over the combat basics. Like Paper Mario and TTYD, you’ve got HP, TP for special attacks (FP), and MP for medals (BP). You fight with Kabbu (a beetle), Vi (a bee), and Leif (a moth). Each one has their own unique basic attacks (Kabbu pierces DEF, Vi can hit flying enemies, and Leif can hit underground enemies) and special skills that use TP and you can equip medals that affect either the entire party of just one character. You can swap the positions of characters at any time (even when a character is knocked out!) as long as all active members haven’t used their turn. However, you only have three set formations: [Vi/Leif/Kabbu], [Kabbu/Vi/Leif], and [Leif/Kabbu/Vi]. Why is this important? Because the character in front gets a natural +1 to their attack power and is targeted more often. 

There are lots of cool medals (badges) you can use!

You can also relay your turn so another character can attack twice, but at a cost of -1 attack power per extra attack a character does. This is an amazing new feature. Got 3 flying enemies? Relay with Kabbu and Leif to Vi and take them all down in one turn. Have a character use a skill, then relay to them to use it again…or use a different skill. It’s pretty sweet.

Relaying a turn to another party member is an essential tool in your arsenal of abilities

Okay, that’s it for the basics. In short… the combat is great. I love the turn relay system combined with the already solid Paper Mario foundation; it all gels together really well with how you approach normal fights and bosses. Being able to relay turns when needed to better utilize a character’s strengths and position them accordingly to better use your medals was very satisfying. I loved being able to figure out strategies and bosses completely blind with only my previous experience to guide me. That was very fun, and I think anyone will feel rewarded once they figure out some dope strategies.
 
Balance wasn’t really a problem as far as normal fights are concerned. I always felt like if something wasn’t working, I could find a way to make it better or had other options to choose from. The bosses and superbosses all had cool moves and one or two unique things about them for the most part. But that’s where the cool stuff ends and my issues with boss AI begin. Maybe this is a “Hard Mode” thing, but a lot of bosses had this pattern: Do things -> start buffing/attacking twice forever/summon minions after x HP is lost. Maybe sometimes they’d use a new move in conjunction with the above, but for the most part many bosses just started attacking more and buffing themselves. Now, of course, not all bosses were like this, but I would say it was enough to be over saturated.

What this lends itself to is the same strategies working all of the time. Tank Do Nothing Kabbu combined with Danger/Poison Vi is ridiculously strong and can wipe almost any boss pretty quickly if you’ve got enough TP-restoring items or both TP Cores equipped. Near the end of my playthrough, I found myself using those strategies to basically obliterate bosses. I was in real danger of a game over maybe a couple times near the end, but honestly, it didn’t feel like it. I felt like I had a pretty easy time because nothing could really stop the aforementioned strategy. This is a pretty big contrast to early and mid game, where bosses felt much more dangerous and I definitely felt in danger of a game over most of the time.

The second issue I had with bosses is that their AI is completely random (for the most part). Now, obviously, bosses have some triggers that are static and you know will come. The problem is that everything else is random, so while you can cook up cool strategies, you can’t fine-tune them like you can in Paper Mario and TTYD. This dampened the experience for me because there are only a few ways to get to an optimal state. I’m totally fine with random boss AI in most other games, but in a game where damage can be so finely tuned, I think having truly random boss AI like this actually takes away from it instead.
  
In Bug Fables, getting into Danger or being Poisoned is where it’s at for damage and defense for your primary attacker. There are a few items that will put you down at 1 HP, but other than that and Weak Stomach, you have to basically wait until a boss deals enough damage (and if you aren’t Kabbu using Taunt, you need to be targeted in the first place). This is how late-game boss battles looked like for me:

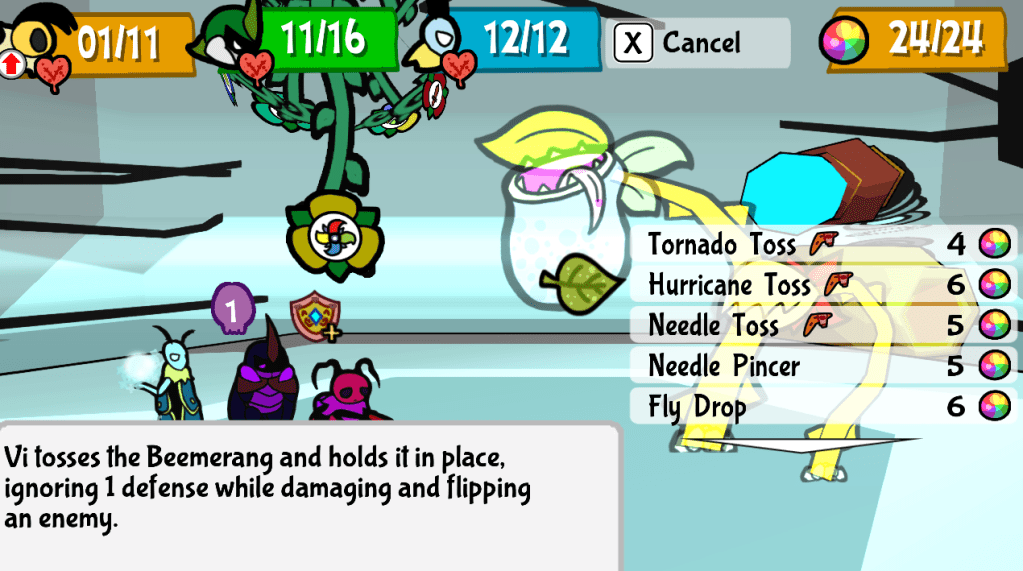
1) Attack until bosses put Vi into Danger -> Spam Tornado Toss (you could sub another move here — didn’t really matter)
2) If Vi dies, use Pep Up; otherwise, Do Nothing on Kabbu to restore HP/keep DEF up
3) If Leif is alive, buff Vi or rally to Vi always. Rarely, use Cleanse on beefed up boss

Exhibit A of the aforementioned strategy

This cycle basically destroyed every boss in EX Boss Rush mode without me healing between rounds or using items. I put Miracle Matter on Leif just to make bosses go faster by letting Vi attack more. I would always keep Vi in front because I didn’t care if she died. She took 1-3 damage most of the time thanks to Last Stand x2 and I’d deal 30-50 in one turn if I also gave Kabbu’s turn to Vi. You could supplement other things around this, but the core is the same.

There are definitely other cool strategies I haven’t explored that utilize Sleep or something or using Berserk or what-have-you (I used a really dope Taunt Kabbu HP Regen setup on the Mini-Boss Rush and it was pretty effective and fun), but the core of my problem is… there’s not a lot of cool ways to get to the state you want to be at to activate Medals you have. You’re either using Big Mistake/something to active Weak Stomach or the status you want to inflict on yourself, or you’re waiting for bosses to just deal enough damage to put you in that range. If they die, just use Kabbu’s Pep Up which puts them in perfect Danger (and waiting for a character to die just so Kabbu can do that is RNG and…yeah). It’s very samey, and because bosses are basically random you can’t manipulate cool positioning or damage you deal to direct them as the battle goes on and you’re just waiting sometimes for things to start happening while not even feeling threatened. The only way to really do that is through Kabbu’s Taunt, but sometimes they could roll to use AoE moves and ruin that anyway. You could be waiting 2-4 extra turns just to get your strategy rolling unless you use one of the few ways to force it to start.

This is a stark contrast to TTYD, where you can do some pretty wild stuff to get into Danger/Peril while also taking/dealing the exact damage you need to and using the exact amount of FP you have to emerge victorious. Point Swap + Double Dip, using a move + Point Swap, KO’ing a partner with Point Swap to force attacks onto Mario, Trial Stew, Poison Shroom, manipulating specific phases that give you extra turns to setup, taking damage on purpose while Charging, using clever DEF to go from full HP -> Danger -> Peril… there are a LOT of ways to craft a cool or interesting strategy or one that just gets into Peril, and that to me is more interesting than what I did for most of Bug Fables’ end game.

With all of this said, I still found the entire end game experience very fun, but most of the cool stuff that bosses have gets shut down by the same things by then and it’s just a waiting game to get there instead of a cool mapped out strategy you can implement with 100% or near-100% certainty, which was a little disappointing. To add onto this, most of the secret codes to impose extra challenges are only slightly different and probably don’t change this cycle (except maybe for MYSTERY which randomizes all Medals). 

So what does that mean for challenge running this game? In my opinion, I think the game still has a lot of challenge running potential. The secret codes on their own aside as challenges, you can use them to do some other cool things like Level Zero, maybe a “Character Alone” run? You can try and use no Danger/Poison or ban Miracle Matter. You could “lock” your formation and see how to play around that. Some won’t change too much, but the fact I can name all of these right now and feel like I’m only scratching the surface means there’s a lot of potential for this game and that’s really exciting! There are quite a few people in my community and I’m sure the Bug Fables’ community that have been challenge running this game for a while, so there’s definitely interest and the game having built-in modifiers only helps. I’ll definitely be doing quite a bit of challenge running for this game myself because combat is super fun to play despite the few issues I had with it during my first play through. Who knows… maybe my opinion will change once I really sink my teeth into some challenge runs!

Just Sayin’

Advertisement

Damage Calculus 101 – Attack, Defense, and Elemental Effects in TTYD

If you’re a Paper Mario: TTYD Challenge runner, this is a must-read by fellow runner Jdaster!

The Super Mario Files

Following my article on evasion badges and misconceptions about how they stack, here’s an in-depth article explaining the Paper Mario: TTYD damage calculation process and all its subtleties.  Normally I’d cover PM64’s equivalent mechanics at least in passing, but Floogal’s GameFAQs guide on Paper Mario stats and attacks is comprehensive and accurate on that matter already, so I’ll not waste words treading already-paved ground.

That said, here’s a list of stuff that will be (mostly) out of the scope of this investigation, unless I flesh out the post after the fact:

  • Details about the base attack power for every move with variable damage (any player moves, stackable move badges, etc.)
  • Details about various defensive and elemental-effect states of every enemy (e.g. Buzzies having different defenses when flipped than when upright).
  • In general, interactions other than simple damage calculation; e.g. flipping shelled enemies, exploding bomb enemies, etc.

For the special point…

View original post 1,383 more words

Placing Pins and Tiering Trinkets: A TTYD Badge Tier List

One of the Gods of #PaperMario Challenge Running shares his thoughts on badges in TTYD. Check it out!

The Super Mario Files

Truly 2017 was a banner year for Paper Mario challenge runs, with the Glitz Pit Discord server surging in popularity and several players popping into the scene.  Discussion of strategies, loadouts, and mechanics of the Paper Mario series has abounded, but the badges, arguably the series’ combat’s defining trait, have always been a particular focal point.  Some badges are loved by all, some ridiculed by all but a few dedicated apologists, and many fall everywhere in-between.

Since stacking badges is what this blog was built on, I’d like to do something a little different here, and exposit my current thoughts on the matter at length, giving my personal ranking of every badge in Paper Mario: TTYD and some justification as to their placements.

To start, I won’t be considering these badges (the “FX-Esque Tier”) in my tier list:

badge_tiers_g

  • The Attack FX badges and W Emblem / L Emblem are…

View original post 4,317 more words

Paper Mario Talks — Pro Mode & Hammer

Continuing with gushing about things I like in my last post about Pre-Hooktail Pit Runs, today’s topic covers something I found exceptionally interesting in Paper: Mario Pro Mode, and that’s how you approach The Master.

If you’re unaware, someone by the name of Clover created a mod of Paper Mario that enhances its difficulty. Enemies do double damage, badge costs have changed, FP costs have changed, new enemy layouts, smart AI, new areas to explore… it’s quite a lot of new content. If you’re curious, click here to check out the release trailer that contains a link to download!

Anyway… one boss, in particular, stood out to me in Pro Mode, and that was The Master. His entire gimmick was changed – he now starts at 0 ATK (first form) / 1 ATK (second form) / 2 ATK (final form) for his basic attack (his combo moves have set damage), and with every strike you inflict on him, his ATK for the basic attack increases by 1. This means a Jump increases his ATK by 2, and Hammer by 1. I’m sure you see where this is going, but let me explain: this new gimmick actually makes Hammer a more viable choice than Jump when fighting him.

In 64 and TTYD, Jump is generally vastly superior to Hammer. It has generally better badges (Multibounce, Sleep/Shrink/Dizzy Stomp, Power Bounce) and nets a greater increase in power when you increase your attack because the attack of both Jumps are increased when you perform a successful Action Command. So, essentially, your ATK for Jump is doubled when compared to Hammer. The only thing Hammer has going for it is against high-DEF enemies and challenge runs that restrict your badges…but most of the time, your partners are there to help clean up. It’s much more effective to rely on Jump than Hammer almost every time. I will note that the Hammer is inherently better in 64 than in TTYD thanks to awesome badges like Power Power Quake, which are souped up Quake Hammers that can easily out-damage Multibounce, but for single targets like bosses, Jump still reigns supreme. However, The Master in Pro Mode turns that on its head.

Because of his unique gimmick, the battle is more about maximizing single hit damage so you can better control how much damage he’s inflicting. You can’t attack The Master recklessly. You need to make sure you’re doing the most damage with every strike to maximize your own damage and minimize his. With Mario’s Hammer, you can more smoothly increment The Master’s damage output to manipulate your HP into Danger or Peril, and using Charge makes sure you’re doing 10+ damage per hit with Hammer and Power Smash or Mega Smash. This makes Hammer a much more viable choice. You need seriously beefed up Jump to match what the Hammer can do, and even then, you’ll have a much harder time manipulating his ATK if it’s always increasing by 2. Honestly, I’m impressed with his design, because Mario’s Hammer being superior carries through for all 3 forms of The Master. It’s a strange concept to grasp. Almost every other boss I fought had me using some combination of D-Down Jump, Spike Shield, Ice Power, and ATK-increasing badges. The Master was the only boss to make me choose Hammer over Jump.

And yes, you could use Power Jump or Mega Jump… but the Hammer itself costs no FP, and The Master has DEF as he grows stronger, so D-Down Pound becomes a viable choice in his later forms. Besides, those two specific Jump badges are Hammer-esque in how they work anyway!

That’s my short spiel on The Master in Pro Mode and why I like it so much. I wish more bosses made Hammer a clearly superior choice over Jump.

Just Sayin’

Paper Mario Talks — How To Break Combat (64): Status

In Paper Mario, there are six kinds of status that the player can inflict on an enemy (Dizzy, Stop, Paralyze, Sleep, Shrink, Attack Down). Let’s take a look at them and how to inflict them!

Attack Down – Reduces an enemy’s attack by 3 for 4 turns. [Chill Out]
Dizzy – Opponent cannot move for x turns (varies by enemy). [Dizzy Dial, Dizzy Shell, Dizzy Stomp]
Paralyze – Opponent cannot move for x turns (varies by enemy). [Power Shock, Mega Shock]
Shrink – Opponent’s damage is halved for x turns. [Shrink Stomp]
Sleep – Opponent cannot move for x turns (varies by enemy). [Sleepy Sheep, Sleep Stomp, Lullaby]
Stop – Opponent cannot move for x turns (varies by enemy). [Stop Watch, Time Out]

For your information, the range of status where it lasts for x turns can vary from 1 – 4 turns.

Of these six, four of them do the exact same thing – hinder an enemy from moving. Without any differences (attacking a sleeping opponent does not wake them up, for instance), these statuses all cripple opponents in the same way, making combat in 64 very simple – find an enemy’s weakness to an immobilizing status and exploit it.

While I enjoy using status, and I consider knowing when and where to utilize status as a key element in strategy in Paper Mario and Paper Mario: The Thousand-Year Door, the monotony of what status do in 64 makes combat really easy. Furthermore, because so many status do the same thing, you can effectively lock an enemy into status and prevent them from ever attacking if they’re weak to two different kinds or very weak to one. Compare this to TTYD, where Dizzy no longer immobilizes enemies, Paralyze doesn’t exist, and enemies can wake from Sleep after being attacked; there’s much more variety, and you can’t really prevent enemies from attacking.

Now, while status is pretty broken in 64, the ability to inflict the same condition with so many different status does have its few benefits, but that mostly applies to challenge running. If you’re trying to inflict status to start setting up with, say, Super Jump Charge, you can cycle between an item/badge and Dizzy Shell or Power Shock to try and get a status inflicted sooner. It’s a cool concept, but that’s really all I find cool about the monotony of status in 64. This specific brand of status monotony is also why really hardcore challenges can be beaten in 64.

Let’s take a small turn and focus on the other two status, Shrink and Attack Down, which both reduce damage Mario takes. As you saw in my previous post, Chill Out’s Attack Down status is ridiculous. For 4 turns, an enemy has -3 ATK. That’s a big deal for the Tank Mario build and for just longevity in general. It cripples enemies in a different way. Sure, they can attack, but doing no damage is the same as not attacking at all (except for the ones that inflict status on Mario, but let’s not talk about those…). To supplement Tank Mario even more is Shrink, which halves an enemy’s damage. Halves. That’s Last Stand without having Last Stand active! With Last Stand and Shrink active, you’d be hard-pressed to find something that can damage Mario besides Final Bowser.

Speaking of… I find Bowser really interesting. Up until Bowser, every enemy in the game is stuck with their fate when inflicted with status. Bowser can remove status from himself (including Attack Down!!) with the Star Rod buff, and is the only enemy capable of removing status on Mario and his Partners. The entire game, you’re used to being able to do pretty much whatever you want, and then Bowser turns that on its head. It’s probably why I find him such a fun and interesting boss, and also why he really ramps up the difficulty curve when it comes to challenge running. But, we can talk about Bowser another time.

Anyway, the bottom line is…status is broken in 64. Even superbosses in Paper Mario: Pro Mode can’t prevent you from status-locking them. And while it’s cool to do that and be rewarded for using different status, I wish there had been more variety because just selecting a different item to do the same thing to an enemy can get a little stale.

Just Sayin’

Paper Mario Talks — An Examination of Danger Mario

When Mario is at 5 HP or less, he’s in what’s known as Danger. If he has 1 HP, he’s in Peril. In Paper Mario and Paper Mario: The Thousand-Year Door, there are badges that only activate when you’re in Danger or Peril. These badges are as follows:

— Close Call (and partner variant) [Increases chance of enemies missing]
— Last Stand (and partner variant) [Halves damage Mario takes]
— Power Rush (and partner variant) [Increases damage Mario deals by 2]
— Mega Rush (and partner variant) [Increases damage Mario deals by 4 (64) / 5 (TTYD)]

These 4 badges are quite powerful and represent a “last chance” kind of effort for the player. It allows them to win by the skin of their teeth in normal gameplay, especially if you have Mega Rush equipped, which only activates when Mario’s in Peril. However, if a player is upgrading HP often, these badges become less useful because you can go entire battles without it activating. On the flip side… there is a badge setup known as Danger Mario. A character in both games called Chet Rippo allows Mario to swap stats around. This makes it possible to make Mario’s HP 5 instead of 10, effectively putting him in permanent Danger. This is the basis of Danger Mario, and it enhances these 4 badges beyond their normal usefulness.

Now, Danger Mario is quite notorious. Many players frown upon it, saying it’s powerful, but not fun. I’m inclined to agree, but I’ll save my opinions for later. For now, let’s jump into what makes Danger Mario so good. Let’s break down TTYD’s first, as it’s the one most well-known as the “Danger Mario” build.

There are quite a few builds of Danger Mario in TTYD. The first one is the most common: hyper offense.

Here’s the setup:

Hyper Offense Danger Mario

– FP Plus
– Spike Shield
– Ice Power
– Multibounce
– Power Bounce
– Quake Hammer
– Power Rush x20+

Now, you’re thinking “20+ Power Rushes? What??” Well, in the Pianta Parlor, you’re able to buy badges for tokens you win while at the parlor. One of them happens to be Power Rush. Buy enough, and you can make Mario a monster, dealing up to 99 damage per Jump if you buy and equip enough. With Spike Shield and Ice Power, Mario can jump on any enemy barring those on the ceiling, but that’s what Quake Hammer is for. Multibounce allows you to OHKO basically every enemy, and Power Bounce lets you destroy bosses in one turn. Truly, this is Mario’s most powerful form offensively.

This specific setup is the one everyone knows about. There are plenty of videos of it online. The reason it’s so powerful is that you can stack badges in TTYD, and there’s an infinite supply of Power Rush badges for Mario to equip. The other three badges can be stacked, but you need to grind badge drops from enemies, making builds focused around stacking them more tedious to implement. The other one I’ve seen used often is one with a bunch of Close Calls, which makes Mario an evasion tank that will never be hit.

Now let’s look at 64’s Danger Mario. Unlike in TTYD, you’re only able to get one of each badge. But, Last Stand functions differently in 64. Instead of being last in the damage calculation and rounding the damage taken up, Last Stand comes before Guarding & Damage Dodges, and rounds down. This is a significant difference and makes Danger Mario in 64 much more potent defensively than TTYD’s. It’s the only Danger Mario setup that can successfully use a Peril Mario setup.

Now, an offensive build in 64 is actually not incredibly potent. While you have Jump Charge/Hammer Charge, Mega Rush and Power Rush don’t stack with each other like they do in TTYD. Furthermore, Mega Rush only increases your ATK by 4. Without any other badges, you’re sitting at only 7 damage with Ultra Boots. Couple in the lack of partners using items AND lack of ATK-increasing items, and your only real way of powering up is Watt’s Turbo Charge, which makes your ATK 8. No, offense isn’t what makes Danger Mario in 64 so potent. It’s Mario’s defensive setup. Let’s look at Tank Mario.

Here’s the build skeleton:

Tank Danger Mario

– Last Stand
– Damage Dodge x2
– Defend Plus
– P-Down, D-Up
– Fire Shield

Without Last Stand active, Mario’s current DEF is 2. With a Guard and two Damage Dodges, Mario can reduce his total damage taken by 5. If you add in Sushie’s Water Block, that total is now 6. With Chill Out, it’s 9. If the move is a Fire move, Fire Shield blocks that for an extra 1 point of damage. Now, since Last Stand comes before guarding, a move reduced by Last Stand can have its damage output effectively reduced by 6 (7 for a fire move) before Last Stand takes effect.

Let’s see what Mario’s taking before he guards with Last Stand active!

  • Final Bowser’s Flame Breath (10) -> 3 / 2 -> 1
    • No Chill Out = 6 / 2 -> 3
      • No Water Block = 7 / 2 -> 3
  • Final Bowser’s Lightning Blast (10) -> 4 / 2 -> 2
    • No Chill Out = 7 / 2 -> 3
      • No Water Block = 8 / 2 -> 4
  • Star Rod Powered Final Bowser Flame Breath** (20) -> 16 / 2 -> 8
  • Huff N. Puff’s Full Power Ground Slam (15) -> 9 / 2 -> 4
  • Huff N. Puff’s Ground Lightning* (12) -> 7 / 2 -> 3
  • Anti Guy’s Flashy Attack (12) -> 6 / 2 -> 3
    • No Chill Out = 9 / 2 -> 4
      • No Water Block = 10 / 2 -> 5
    • No Water Block = 7 / 2 -> 3

*Huff N’ Puff’s Lightning Attacks go through Water Block’s 1 DEF increase.
**When Bowser has the Star Rod active, Chill Out will not work on him.

Look at that damage! Because no attacks pierce in 64, everything is affected by all DEF boosts Mario has. Now, let’s factor in Guarding and Damage Dodges!

  • Final Bowser’s Flame Breath = 0 damage
    • No Chill Out = 0 damage
      • No Water Block = 0 damage
  • Final Bowser’s Lightning Blast = 0 damage
    • No Chill Out = 0 damage
      • No Water Block = 1 damage
  • Star Rod Powered Final Bowser Flame Breath = 5 damage
  • Huff N. Puff’s Full Power Ground Slam = 1 damage
  • Huff N. Puff’s Ground Lightning = 0 damage
  • Anti Guy’s Flashy Attack = 0 damage
    • No Chill Out = 1 damage
      • No Water Block = 2 damage
    • No Water Block = 0 damage

So, with 6 badges equipped, Mario has successfully negated damage from all but a few attacks, and some don’t even need Water Block or Chill Out! The only move that truly defeats him is Final Bowser’s Flame Breath while being boosted with the Star Rod. That’s an insanely tanky Mario. Even without the extra badges increasing DEF, Last Stand rounding down coupled with Chill Out or Water Block can cripple most enemies and bosses for practically the whole game. And, unlike TTYD where you have to wait until after Chapter 5 to access permanent Danger Mario, you can access permanent Danger as early as pre-Chapter 2 in 64. You also don’t need to stack any badges to achieve this level of defensive prowess.

With only 6 badges equipped, you have more than enough BP to equip some badges that boost ATK, D-Down Jump, Flower Saver, HP Drain, and more! You can also equip Dodge Master for easier guarding. With this setup, Mario can basically emulate superguarding from TTYD by equipping Zap Tap and tanking his way through enemies.

So, now that we’ve broken down common builds of Danger Mario and how they function, what do I think of Danger Mario? I think 64 definitely has the more broken Danger Mario. It requires no grinding for stackable badges and only requires a few badges to be truly terrifying. Even Last Stand alone is ridiculous, and because Chill Out exists, it just cripples enemies.

And yet, for how broken 64 Danger Mario is, I find it fun to use when it’s needed. Using only 1 of each badge forces more strategic thinking and planning in both games. And with the exclusion of items like Point Swap and Trial Stew in 64, it becomes even more pronounced. And, because most damage is moderately high from more deadly enemies if you miss a guard, there’s still a feeling of tension. You can’t mindlessly run through the game Multibouncing everything in sight with +40 ATK. If you miss a couple guards, you’ll probably game over. I feel the same way about TTYD, but like I said earlier, that only applies with 1 of each badge equipped. Stacking a ton of them can be fun once just to see Mario run a train through every enemy and boss left, but being a challenge runner, I prefer being challenged and not mindlessly playing. Although, I will say I think the evasion tank build is quite hilarious and cool, and am a fan of it over the hyper offense setup.

All that being said, I do tend to stay away from Danger badges – especially Mega Rush in TTYD and Last Stand in 64 – if I can help it, but I’ll use them if I need to. Sometimes, the most elegant or most creative strategies require them.

Also, Close Call is incredible. Seriously.

Just Sayin’