Kappy Spotlight Series Reference Post

This blog post will serve as a reference page for all written Kappy Spotlight posts on this blog for quick and easy access.

A Paper Mario Challenge Runner’s review of Bug Fables’ combat

SPOILER WARNING: This review contains spoilers! Don’t read further if you haven’t played the game! I just had a great idea: go play it right now, then come back and read this! Seriously, go play it.

As one of the best in the Paper Mario challenge running business, I’d had my eye on Bug Fables for a while. Once people from my community really started getting into it and recommending I stream it, I decided to take the plunge and wound up playing a very impressive spiritual successor to the first two entries in the Paper Mario series. I liked the story and the characters; honestly, I thought they were better then any Paper Mario game. The music is good, the art is fine, the side quests are great — bottom line: If you’re a fan of Paper Mario, you’re doing yourself a disservice NOT playing this game.

But that’s not what this review is about. This is a review of the game’s combat in regards to challenge running potential and high-level game play. I highly suggest you go play the game first before you read this (or at least have some idea of the medals) because some of these strategies will likely spoil you.

As a disclaimer: when I first started the game, my entire chat told me “Hey, equip the Hard Mode medal, it’s the way the developers intended you to play the game”. If that’s how they wanted it to be played, then I had no choice to oblige. This review is about combat with that medal equipped at all times.

Let’s go over the combat basics. Like Paper Mario and TTYD, you’ve got HP, TP for special attacks (FP), and MP for medals (BP). You fight with Kabbu (a beetle), Vi (a bee), and Leif (a moth). Each one has their own unique basic attacks (Kabbu pierces DEF, Vi can hit flying enemies, and Leif can hit underground enemies) and special skills that use TP and you can equip medals that affect either the entire party of just one character. You can swap the positions of characters at any time (even when a character is knocked out!) as long as all active members haven’t used their turn. However, you only have three set formations: [Vi/Leif/Kabbu], [Kabbu/Vi/Leif], and [Leif/Kabbu/Vi]. Why is this important? Because the character in front gets a natural +1 to their attack power and is targeted more often. 

There are lots of cool medals (badges) you can use!

You can also relay your turn so another character can attack twice, but at a cost of -1 attack power per extra attack a character does. This is an amazing new feature. Got 3 flying enemies? Relay with Kabbu and Leif to Vi and take them all down in one turn. Have a character use a skill, then relay to them to use it again…or use a different skill. It’s pretty sweet.

Relaying a turn to another party member is an essential tool in your arsenal of abilities

Okay, that’s it for the basics. In short… the combat is great. I love the turn relay system combined with the already solid Paper Mario foundation; it all gels together really well with how you approach normal fights and bosses. Being able to relay turns when needed to better utilize a character’s strengths and position them accordingly to better use your medals was very satisfying. I loved being able to figure out strategies and bosses completely blind with only my previous experience to guide me. That was very fun, and I think anyone will feel rewarded once they figure out some dope strategies.
 
Balance wasn’t really a problem as far as normal fights are concerned. I always felt like if something wasn’t working, I could find a way to make it better or had other options to choose from. The bosses and superbosses all had cool moves and one or two unique things about them for the most part. But that’s where the cool stuff ends and my issues with boss AI begin. Maybe this is a “Hard Mode” thing, but a lot of bosses had this pattern: Do things -> start buffing/attacking twice forever/summon minions after x HP is lost. Maybe sometimes they’d use a new move in conjunction with the above, but for the most part many bosses just started attacking more and buffing themselves. Now, of course, not all bosses were like this, but I would say it was enough to be over saturated.

What this lends itself to is the same strategies working all of the time. Tank Do Nothing Kabbu combined with Danger/Poison Vi is ridiculously strong and can wipe almost any boss pretty quickly if you’ve got enough TP-restoring items or both TP Cores equipped. Near the end of my playthrough, I found myself using those strategies to basically obliterate bosses. I was in real danger of a game over maybe a couple times near the end, but honestly, it didn’t feel like it. I felt like I had a pretty easy time because nothing could really stop the aforementioned strategy. This is a pretty big contrast to early and mid game, where bosses felt much more dangerous and I definitely felt in danger of a game over most of the time.

The second issue I had with bosses is that their AI is completely random (for the most part). Now, obviously, bosses have some triggers that are static and you know will come. The problem is that everything else is random, so while you can cook up cool strategies, you can’t fine-tune them like you can in Paper Mario and TTYD. This dampened the experience for me because there are only a few ways to get to an optimal state. I’m totally fine with random boss AI in most other games, but in a game where damage can be so finely tuned, I think having truly random boss AI like this actually takes away from it instead.
  
In Bug Fables, getting into Danger or being Poisoned is where it’s at for damage and defense for your primary attacker. There are a few items that will put you down at 1 HP, but other than that and Weak Stomach, you have to basically wait until a boss deals enough damage (and if you aren’t Kabbu using Taunt, you need to be targeted in the first place). This is how late-game boss battles looked like for me:

1) Attack until bosses put Vi into Danger -> Spam Tornado Toss (you could sub another move here — didn’t really matter)
2) If Vi dies, use Pep Up; otherwise, Do Nothing on Kabbu to restore HP/keep DEF up
3) If Leif is alive, buff Vi or rally to Vi always. Rarely, use Cleanse on beefed up boss

Exhibit A of the aforementioned strategy

This cycle basically destroyed every boss in EX Boss Rush mode without me healing between rounds or using items. I put Miracle Matter on Leif just to make bosses go faster by letting Vi attack more. I would always keep Vi in front because I didn’t care if she died. She took 1-3 damage most of the time thanks to Last Stand x2 and I’d deal 30-50 in one turn if I also gave Kabbu’s turn to Vi. You could supplement other things around this, but the core is the same.

There are definitely other cool strategies I haven’t explored that utilize Sleep or something or using Berserk or what-have-you (I used a really dope Taunt Kabbu HP Regen setup on the Mini-Boss Rush and it was pretty effective and fun), but the core of my problem is… there’s not a lot of cool ways to get to the state you want to be at to activate Medals you have. You’re either using Big Mistake/something to active Weak Stomach or the status you want to inflict on yourself, or you’re waiting for bosses to just deal enough damage to put you in that range. If they die, just use Kabbu’s Pep Up which puts them in perfect Danger (and waiting for a character to die just so Kabbu can do that is RNG and…yeah). It’s very samey, and because bosses are basically random you can’t manipulate cool positioning or damage you deal to direct them as the battle goes on and you’re just waiting sometimes for things to start happening while not even feeling threatened. The only way to really do that is through Kabbu’s Taunt, but sometimes they could roll to use AoE moves and ruin that anyway. You could be waiting 2-4 extra turns just to get your strategy rolling unless you use one of the few ways to force it to start.

This is a stark contrast to TTYD, where you can do some pretty wild stuff to get into Danger/Peril while also taking/dealing the exact damage you need to and using the exact amount of FP you have to emerge victorious. Point Swap + Double Dip, using a move + Point Swap, KO’ing a partner with Point Swap to force attacks onto Mario, Trial Stew, Poison Shroom, manipulating specific phases that give you extra turns to setup, taking damage on purpose while Charging, using clever DEF to go from full HP -> Danger -> Peril… there are a LOT of ways to craft a cool or interesting strategy or one that just gets into Peril, and that to me is more interesting than what I did for most of Bug Fables’ end game.

With all of this said, I still found the entire end game experience very fun, but most of the cool stuff that bosses have gets shut down by the same things by then and it’s just a waiting game to get there instead of a cool mapped out strategy you can implement with 100% or near-100% certainty, which was a little disappointing. To add onto this, most of the secret codes to impose extra challenges are only slightly different and probably don’t change this cycle (except maybe for MYSTERY which randomizes all Medals). 

So what does that mean for challenge running this game? In my opinion, I think the game still has a lot of challenge running potential. The secret codes on their own aside as challenges, you can use them to do some other cool things like Level Zero, maybe a “Character Alone” run? You can try and use no Danger/Poison or ban Miracle Matter. You could “lock” your formation and see how to play around that. Some won’t change too much, but the fact I can name all of these right now and feel like I’m only scratching the surface means there’s a lot of potential for this game and that’s really exciting! There are quite a few people in my community and I’m sure the Bug Fables’ community that have been challenge running this game for a while, so there’s definitely interest and the game having built-in modifiers only helps. I’ll definitely be doing quite a bit of challenge running for this game myself because combat is super fun to play despite the few issues I had with it during my first play through. Who knows… maybe my opinion will change once I really sink my teeth into some challenge runs!

Just Sayin’

Kappy’s Paper Mario Challenge Running Tier List v7.0 (October 2019)

Since the end of December of 2017, I’ve been keeping tabs on the players who challenge run Paper Mario and Paper Mario: The Thousand-Year Door. I did this mainly because despite there not being an official list of the best players from the Glitz Pit Discord, there’s still discussion about it. Also, I like tier lists. LOL.

Let’s jump in!

  • + symbol means edge case for next tier up
  • This is my personal opinion; I repeat: this list is NOT objective.

GOD TIER

— The best of the best. The cream of the crop.
(sorted alphabetically)
COMBINED
  • Kappy
  • Koop

TTYD

None.

64
None.

ELITE TIER

— Players in this tier are highly proficient in their game of choice. These are some of the best.
(sorted alphabetically)
COMBINED
  • Fatguy703+ – Fatguy has almost completed his run of Master Quest. So far, he’s been doing well and has a few creative strategies. There’s not enough for me to put him in God Tier, but we’ll see how the rest of his run plays out.
  • GamerFourFun — Gamer has done a slew of things in Master Quest, a super-tough mod for Paper Mario 64. I was thinking of giving him a + because what he’s done is quite impressive, but I don’t think challenges completed in the mod are enough weight compared to vanilla challenges. He’s easily cemented his spot here with those completions, but the mods tailor a certain play style over others and are not always indicative of player skill over figuring out the designer’s intended puzzle. He also has a “battle first, strategize later” still, which just doesn’t cut it for even an edge-case for God tier in my eyes.

TTYD
  • Dyla — Dyla is back with a nice 10 HP Prologue Pit completion (without Super Jump) not too long ago moving him up to Elite. He’s now doing Impossible Mode and (I hope) more challenges after that. Now, he could very quickly fall back to Great+; we’ll see how he performs in the future.
  • Miccat87 — Miccat recently completed 10 HP Prologue Pit, which is awesome. Only a small portion has been uploaded, so I can’t hand him a definite + just yet, but I do think he could be another contender for God-level in TTYD. Time will tell.

64
None.

GREAT TIER

— Players in this tier are proficient in their game of choice. These are what I would consider to be a “general” challenge runner.
(sorted alphabetically)
COMBINED

None.

TTYD

None.

64
  • Auron Nomcario — Auron recently completed a 10 HP Mario Alone run, officially putting him back into being active for Paper Mario 64! I hope he plays a little more. I could see him going above Elite if he stays active.
  • Miccat87
  • TwoPieRadian — TwoPieRadian is back into challenge running! He recently completed a cool “crit” mod of 64 where enemies could randomly critical and deal more damage. Not enough to jump him anywhere, but I’m glad he’s back! Hopefully, we’ll see more of him.

GOOD TIER

— Players here have breached past what I would consider “casual” and are officially challenge runners (or have the skills to be one). Most new challenge runners will be put her since usually they’ve only completed one or two challenges or are in the process of completing their first one.
(sorted alphabetically)
COMBINED

None.

TTYD
  • Auron Nomcario+
  • DiamondCrafterA — DiamondCrafter is back to try and finish his Impossible Mode run! I think if he finishes it soon I can easily put a + next to his name.
  • Mr_Some1 — Mr_Some1 has come back into the realm of activity with a FP Only run. I hope that he finishes this and continues to do a couple more runs.
  • TwoPieRadian — Pie is also back with TTYD! He’s been doing BP Only right now, which is a pretty standard run for someone at this level. We’ll see how it goes from there.

64
  • Mailguy — Mailguy has come back to activity with a Hammerman run! We’ll see where he stands once the run is finished and if he decides to do more.

INACTIVE TIER

— Inactive Players. Players have their last tier listed for reference.
(sorted alphabetically)
  • A. A. Ran — Elite Tier (TTYD) | Good Tier+ (64)
  • amazydayzee — Elite Tier (TTYD)
  • avengah — Elite Tier (TTYD)
  • Blanket P.I. — Great Tier (COMBINED)
  • catbooger — Good Tier (TTYD)
  • Codebox — Great Tier (COMBINED)
  • DarkMario1000 — Great Tier+ (TTYD) | Elite Tier (64)
  • Dount Cooku — Good Tier (TTYD)
  • Feposo — Good Tier (TTYD)
  • Gibstack — Elite Tier (TTYD)
  • Gradis — Good Tier (TTYD)
  • Grassdigger — Great Tier+ (TTYD)
  • ilikepieinmouth — Elite Tier+ (TTYD)
  • Jayjar100 — Good Tier (TTYD)
  • JakeTheSnake — Good Tier (TTYD)
  • Jdaster64 — God Tier (COMBINED)
  • Jon — Great Tier (64)
  • Lolyuri — Good Tier (64)
  • Mathcat — Good Tier (TTYD)
  • Michael The Fox — Great Tier (TTYD)
  • MilesLuigi — Elite Tier (COMBINED)
  • MellowMathTeacher — Great Tier (COMBINED)
  • MorningStar — Great Tier+ (TTYD)
  • ngburns — Great Tier (TTYD)
  • Olmi — Elite Tier (COMBINED)
  • OmegaRaptor — Good Tier (TTYD)
  • Prentiscool — Good Tier (TTYD)
  • simodomino — Good Tier (COMBINED)
  • Skawo — Elite Tier (COMBINED)
  • Slime — Good Tier (TTYD)
  • Starlad — Good Tier (64)
  • StarmanOmega — Great Tier (TTYD)
  • stebbdogg — Great Tier (TTYD)
  • Stylish — Good Tier+ (TTYD)
  • Wayoshi — Elite Tier (TTYD) | Great Tier (64)
  • ThatOneSpyGuy — Elite Tier (TTYD)
  • Timmy — Great Tier (64)
  • TRex Quisite — Great Tier (COMBINED)
NOTABLE CHANGES & THOUGHTS
  • We’ve seen a slight surge in returning players, which is awesome 🙂 I hope this trend continues.
  • Paper Mario Master Quest dropped, which is an ultra-hard mod of Paper Mario 64 that is designed to challenge God/Elite Tier level players. Honestly, it’s difficult, but due to how most of it is designed, I will not be adding any new players who have completed this mod. If they’re good enough and want to be on this list, they can prove themselves through challenge runs in vanilla.

And that’s it for this version of the tier list! I hope you all enjoyed reading my thoughts on this. If you’re interested in making it on this list, start challenge running (and if I missed you or you think someone else should be added, please let me know via Twitter or Discord DM so I can update this and future tier lists)! A great resource for challenge runners is the Glitz Pit, a Discord server dedicated to challenge running the Paper Mario series. You can also check out my Discord server.

Just Sayin’

September 2018
December 2018
March 2019
July 2019

Kappy’s Paper Mario Challenge Running Tier List v6.0 (July 2019)

Since the end of December of 2017, I’ve been keeping tabs on the players who challenge run Paper Mario and Paper Mario: The Thousand-Year Door. I did this mainly because despite there not being an official list of the best players from the Glitz Pit Discord, there’s still discussion about it. Also, I like tier lists. LOL. This should’ve come out in June, but I was quite busy that month so it was pushed back to July.

Let’s jump in!

  • + symbol means edge case for next tier up
  • This is my personal opinion; I repeat: this list is NOT objective.

GOD TIER

— The best of the best. The cream of the crop.
(sorted alphabetically)
COMBINED
TTYD
None.
64
None.

ELITE TIER

— Players in this tier are highly proficient in their game of choice. These are some of the best.
(sorted alphabetically)
COMBINED
  • Fatguy703+ — Listen here, all ye. Fatguy has beaten my nearly 2-year-long record of reset count in Impossible Mode. While his consistency when it comes to the Pit isn’t the best, it’s good, and his superguarding and strategy are great when he’s focused. He’s actually always been great despite all the memes and I think with this he is on the cusp of being a God. How he does in Master Quest, I think, will determine if his foot’s in the door or to the exit; I’ll be watching closely.
  • GamerFourFun
TTYD
  • Gibstack
  • ilikepieinmouth+ — While Pie is still undoubtedly the best superguarder, I just can’t keep him up as a God on superguarding alone. The superguard-heavy challenges he’s completed are nothing short of impressive, but I look for more than just superguarding in amazing players. He’ll likely stay here for eternity until I see more strategy that’s not about reducing superguards.
  • Miccat87
64
  • DarkMario1000

GREAT TIER

— Players in this tier are proficient in their game of choice. These are what I would consider to be a “general” challenge runner.
(sorted alphabetically)
COMBINED
None.
TTYD
  • DarkMario1000+ — DarkMario, at this point, is on the level of Elite+ when it comes to strategy. There’s really no way around it — the guy knows his stuff. Still, I’d like to see more footage. Seeing him do a run would really help cement him in Elite. As it stands, I just can’t bring myself to move him up without more concrete gameplay.
  • Gible_V — Coming back from inactivity, Gible has finally completed Impossible Mode. Along with the other Pit challenges she’s completed, I think she’s earned her spot here. We’ll see if she goes any further.
  • Grassdigger+ — Grassdigger’s in the same boat as DarkMario — his breakout performance during the puzzle challenges was quite impressive, despite him taking a small back seat later on. I think he might’ve won otherwise. If he ever decides to start posting more videos, I’m sure he’ll be Elite.
  • Kyle
  • MorningStar+ — Just saw this guy recently, and I like what I see. He recently finished Level Zero Double Damage (including a perfect Gloomtail fight!) and literally finished the Pit with no Strange Sack as I’m posting this to my blog. If he continues, he can only go up.
64
  • Jon
  • Miccat87

GOOD TIER

— Players here have breached past what I would consider “casual” and are officially challenge runners (or have the skills to be one). Most new challenge runners will be put her since usually they’ve only completed one or two challenges or are in the process of completing their first one.
(sorted alphabetically)
COMBINED
  • simodomino
TTYD
  • Auron Nomcario+ —  I’d say that Auron’s done enough with puzzles alone to earn him a +. Not enough to jump to Great tier, but he’s really close!
  • Slime
  • Stylish+
64
None.

INACTIVE TIER

— Inactive Players. Players have their last tier listed for reference.
(sorted alphabetically)
  • A. A. Ran — Elite Tier (TTYD) | Good Tier+ (64)
  • amazydayzee — Elite Tier (TTYD)
  • Auron Nomcario — Great Tier (64)
  • avengah — Elite Tier (TTYD)
  • Blanket P.I. — Great Tier (COMBINED)
  • catbooger — Good Tier (TTYD)
  • Codebox — Great Tier (COMBINED)
  • DiamondCrafterA — Good Tier (TTYD)
  • Dount Cooku — Good Tier (TTYD)
  • Dyla — Great Tier+ (TTYD)
  • Feposo — Good Tier (TTYD)
  • Gradis — Good Tier (TTYD)
  • Jayjar100 — Good Tier (TTYD)
  • JakeTheSnake — Good Tier (TTYD)
  • Jdaster64 — God Tier (COMBINED)
  • Lolyuri — Good Tier (64)
  • Mailguy — Good Tier (64)
  • Mathcat — Good Tier (TTYD)
  • Michael The Fox — Great Tier (TTYD)
  • MilesLuigi — Elite Tier (COMBINED)
  • MellowMathTeacher — Great Tier (COMBINED)
  • Mr_Some1 — Good Tier (TTYD)
  • ngburns — Great Tier (TTYD)
  • Olmi — Elite Tier (COMBINED)
  • OmegaRaptor — Good Tier (TTYD)
  • Prentiscool — Good Tier (TTYD)
  • Skawo — Elite Tier (COMBINED)
  • Starlad — Good Tier (64)
  • StarmanOmega — Great Tier (TTYD)
  • stebbdogg — Great Tier (TTYD)
  • Wayoshi — Elite Tier (TTYD) | Great Tier (64)
  • ThatOneSpyGuy — Elite Tier (TTYD)
  • Timmy — Great Tier (64)
  • TRex Quisite — Great Tier (COMBINED)
  • TwoPieRadian — Good Tier (TTYD) | Great Tier (64)
NOTABLE CHANGES & THOUGHTS
  • ilikepieinmouth has moved down from God Tier to Elite Tier because he continues to only do superguard-heavy runs when he does play. There’s no question of his superguarding superiority, but…there’s more to playing this game than superguarding. Good strategy cannot be overlooked.
  • Jdaster64, despite participation in the most recent puzzle challenges, has moved to Inactive. I thought about keeping him up because of the puzzle challenges, but he stopped pretty early in the game and he hasn’t done anything with Paper Mario in 3+ months, so Inactive seemed to be the best fit for now.
  • As I predicted, there are a lot of inactive players. C’mon, guys, let’s do some runs! I want to see more new faces!

And that’s it for this version of the tier list! I hope you all enjoyed reading my thoughts on this. If you’re interested in making it on this list, start challenge running (and if I missed you or you think someone else should be added, please let me know so I can update this and future tier lists)! A great resource for challenge runners is the Glitz Pit, a Discord server dedicated to challenge running the Paper Mario series. You can also check out my Discord server.

Just Sayin’

September 2018
December 2018
March 2019
October 2019

Kappy’s Spotlight — Mega Jump

It’s that time again: #KappySpotlight time, where I talk about badges/items/partners/etc… that are generally seen as “bad” and not used very often by challenge runners. I dive deeper into why they’re perceived the way they are with some cool strategies centered around them mixed in! Today, I’ll be covering my first badge in 64, and probably the worst Jump badge of them all in said game — MEGA JUMP!!

Mega_jump_badge
BP Cost: 3
FP Cost: 6
Move: Deals Jump (3+3) + 4 damage to a single enemy.
Glitz Pit Rank: F

Mega Jump is one of the last badges you get in Paper Mario 64. You get it in Chapter 7, and while it has the “Jump is a Hammer” property of Power Jump and an added 2 damage compared to that badge, it costs triple the FP of Power Jump and triple the BP. Triple the FP and BP for +2 damage? Yeah, it’s easy to see why challenge runners don’t really use the move often. And by the time you get it, you’ve got basically every option that outclasses it. When you can just Power Bounce (or even Power Jump!), it’s tough to compete, especially when the other two are just so much more FP efficient. However, if you’ve got a lot of FP to spare, you can make some use of that extra damage.

CRYSTAL KING STRAT

15 HP, 40 FP
BADGES: Mega Jump, All or Nothing, Power Plus, Last Stand, Damage Dodge x2, Flower Saver, Mega Rush (27 BP. 30 with HP Plus)

ITEMS: Shooting Star

T1: Mega Jump (60), Electro Dash (55) [Guard 2]
T2: Mega Jump (45), Electro Dash (40)
T3: Turbo Charge, Do Nothing
T4: Mega Jump (25), Electro Dash (20)
T5 or T6: Mega Jump (5), Electro Dash [potential KO]

If heal T4 & T5

T7: Jump (6), Do Nothing
T8: Shooting Star [KO]

This is actually a pretty cool strat, but look at how much FP you need! Crystal King has 70 HP, 6 ATK, and 2 DEF. Despite these actually pretty good stats, he’s a huge pushover with easy-to-abuse AI, meaning we can destroy him with Mega Jump provided we have the FP. This strategy also nicely showcases the power of Peril combined with Last Stand in 64.

The goal of this strategy was to get rid of the RNG that Crystal King has for healing with Mega Jump and Electro Dash. Let’s start with the setup. Turns 1 & 2, we just Mega Jump and Electro Dash for 15 damage per turn. At base, Mega Jump deals 10 damage. With Crystal King’s DEF, we’re at 8, so we equip a Power Plus and All or Nothing to get that back up to 10. Now, Crystal King uses Bit Spit if he has Ice Bits on the field, which he does Turn 1. We take 4 damage each from those without guarding. With guarding, we take 1. So, we get hit by one then Guard two of them for (4+1+1) damage to be at 9 HP. Turn 2, Crystal King will summon Ice Bits. Turn 3, we set up Mario with Turbo Charge so that Mario will be dealing 15 damage instead of 14 damage in Peril. Mario does nothing to ensure Crystal King doesn’t try to heal just yet. He’ll use the Ice Bit Spit attack. We don’t guard any attacks, putting Mario at 5 HP with the first Ice Bit. Now that Mario’s at 5 HP, Last Stand kicks in, which means the other two Ice Bit attacks deal 2 damage instead of 4. With those two 2 damage attacks, Mario’s gone from 9 HP to 1 HP, putting us in Peril.Turn 4, we begin our manipulation and continue on this path until Crystal King is KO’d. On Turn 4, Crystal King is triggered to use Ice Beam. If he heals, we just Mega Jump and Electro Dash again Turn 5, and if he heals again after that, we Mega Jump and Electro Dash Turn 6, then take the guaranteed Ice Beam and do it again. Turn 7, Turbo Charge wears off, so we Jump and Do Nothing. At this point, Crystal King can either Ice Beam or create 3 clones. To circumvent the cloning, we use a Shooting Star to guarantee he gets hit and is KO’d. if he uses Ice Beam earlier, then we KO him earlier. Perfect damage and a lot of Mega Jump — nice! If you wanted, you could have 45 FP and not need a Flower Saver. I just liked being able to fit in 30 BP perfectly if HP Plus is used.

Now, there are a couple other places you can use Mega Jump, and that’s against Hallway Bowser and Final Bowser. Given that both can get rid of Water Block/Cloud Nine/Turbo Charge, as well as having an extremely punishing 3-cap most of the time for Power Bounce, you can get around the same damage over time with Mega Jump, even if you’re Power Bouncing in Peril, especially since it can be hard to maintain if you’re not great at Guarding Bowser’s attacks. Other than that, I see no reason to try and use this in normal battles., It’s likely overkill and just a waste of FP.

All in all, Mega Jump comes way too late to really be useful, but try it out next time you’re fighting Final Bowser! You might be surprised. As always, feel free to use the strategy I made or adapt it into something yourself! I’ll be doing a vote for my next spotlight, so please be sure to follow me on Twitter or join my Discord server to get notified when I ask for suggestions!!

Just Sayin’

Kappy’s Spotlight — Hammerman

It’s that time again: #KappySpotlight time, where I talk about badges/items/partners/etc… that are generally seen as “bad” and not used very often by challenge runners. I dive deeper into why they’re perceived the way they are with some cool strategies centered around them mixed in! Today, I’ll be covering a badge that’s simply…smashing — HAMMERMAN!

Hammerman

Glitz Pit Rank: D-

This badge suffers from its namesake — hammers. Hammers are generally inferior to Jumping once you start to buff Mario’s ATK. With great move badges like Multibounce and Power Bounce, combined with the support badges Spike Shield and Ice Power, Mario is able to deal damage to all non-ceiling enemies, and with enough ATK-increasing badges, he can wipe out normal battles and boss battles in 1-3 turns. Hammers, on the other hand, are less effective. The biggest drawback is that you can’t hit anywhere but the front without Hammer Throw, and Quake Hammer and Fire Drive can’t hit aerial enemies. Hammer’s biggest positive is that it has higher base damage, so whereas a Jump may not deal damage to a high-DEF enemy, Hammer can. Unfortunately, as said before: increasing ATK only helps Jump more and more, and since you get Power Bounce and badges like PowerRush/Mega Rush so early, it’s tough to compete with Jump when challenge runners are great at manipulating Mario’s HP to get into Danger/Peril quickly.

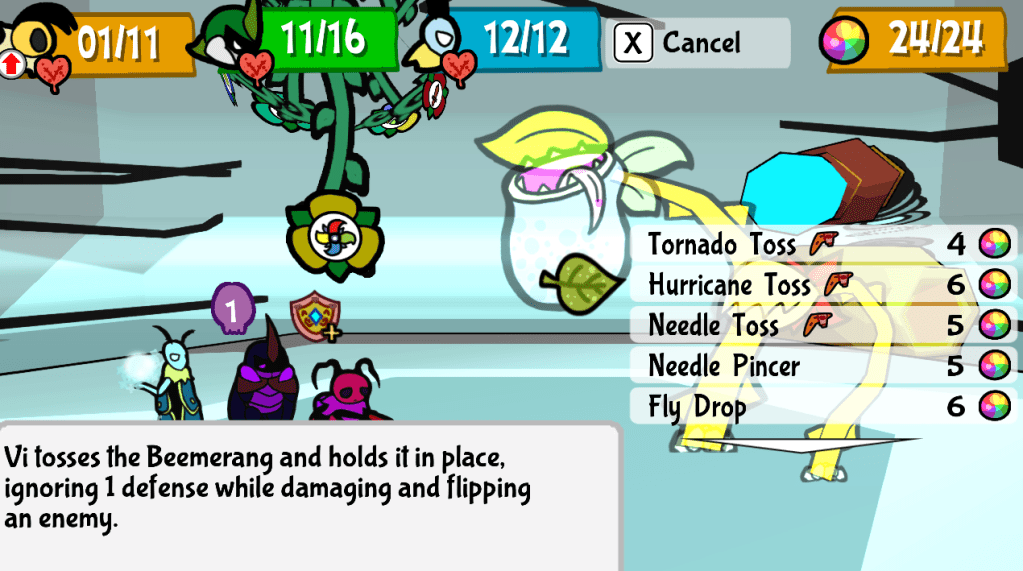
Hammerman is a little different than move badges like Power Smash or Fire Drive because it gets rid of Jumping entirely, meaning Hammer is your only option. Now, this isn’t really great, but partners are so versatile that if you wanted to run a Hammer-centric build, you could quite easily and still be an effective fighter, and the 2 BP isn’t bad for a flat increase to damage. Let’s look at a couple places where Hammerman can be put to very good use!

THE MOON

The Moon in Chapter 7 houses an enemy that Jump quite literally cannot compete with unless Mario’s in Peril/Danger. Moon Clefts have 5 DEF. An insane amount, to be sure. At this point, you’ve probably got Jumpman and 2 Power Plus badges equipped. Well, that’s 6 ATK for your Jump…and 1 damage to Moon Clefts. You’d need to be in Danger to KO them with a normal Jump, and in Peril to KO them with Multibounce. With Hammerman, you don’t need any of this. In fact, from the get-go you can KO them all with Quake Hammer. Quake Hammer’s base ATK is 2. With 2 Power Plus badges and Hammerman, it’s at 5. Throw on P-Up D-Down and you’ve got an easy way to KO Moon Clefts with no effort. Throw on Flower Finder/Flower Savers and you can literally win every battle on the Moon (besides the ones with Z-Yux…but your partners can deal with those guys) without batting an eye.  Bonus points go to Hammer Throw having an ATK of 10 at this point and being able to easily KO Z-Yux as well.

PIT OF 100 TRIALS FLOORS 51-99

You might be thinking, “Wow, the later half of the Pit, Kappy? How is Hammer really good there?” Well, let’s take a look at the enemy list for these floors.

50s —– Badge Bandit | Ice Puff | Dark Boo | Red Chomp | Moon Cleft

60s —– Dark Lakitu (+ Sky-Blue Spiny) | Dry Bones | Dark Wizzerd | Frost Piranha | Dark Craw

70s —– Wizzerd | Dark Koopatrol | Phantom Ember | Swoopula | Chain Chomp

80s —– Spunia | Dark Bristle | Arantula | Piranha Plant

90s —– Elite Wizzerd | Poison Puff | Bob-ulk | Swampire | Amazy Dayzee

Now, let’s get this out of the way: there are quite a few enemies that Hammers can’t deal with easily. However, we have our partners, and they all can easily deal with the enemies Hammer can’t. Let’s assume we’re at end-game with Power Plus x2, Hammerman, All or Nothing, Power Rush, and Mega Rush equipped along with Fire Drive, Quake Hammer, Power Smash, and Hammer Throw. Let’s do some quick math when Mario’s in Peril…

Fire Drive Damage: Base (5) + Power Plus badges (2) + Hammerman (1) + All or Nothing (1) + Power Rush (2) + Mega Rush (5) = 16 piercing damage (decreasing with each hit).
Quake Hammer Damage: Base (2) + Power Plus badges (2) + Hammerman (1) + All or Nothing (1) + Power Rush (2) + Mega Rush (5) = 13 piercing damage.
Hammer Throw Damage: Base (6) + Power Plus badges (2) + Hammerman (1) + All or Nothing (1) + Power Rush (2) + Mega Rush (5) = 17 damage.

Power Smash Damage: Base (8) + Power Plus badges (2) + Hammerman (1) + All or Nothing (1) + Power Rush (2) + Mega Rush (5) = 19 damage.

That’s actually quite a bit of damage. You can KO a loadout of 4 Badge Bandits (12 HP), Chain Chomps (7 HP), Red Chomps (5 HP), Dry Bones (8 HP), Ice Puffs (provided they’re ground | 9 HP), Frost Piranhas (10 HP)…I think you get it. With the combined might of Fire Drive + Quake Hammer, you can lay waste to quite a few enemy loadouts. You can even KO 5 Spunias (12 HP) with Fire Drive after the last one takes Burn damage or is superguarded. That’s crazy. With this much damage on Fire Drive, you can even KO 5 Elite Wizzerds (12 HP) in one turn and they won’t even attack you!

Quake Hammer’s utility is more for piercing through Chomps, Clefts, and the Dark Bristles, while simultaneously being able to KO lower HP enemies like Badge Bandits or Frost Piranhas for less FP. Fire Drive is used to take out bigger HP enemies like Arantulas, Dark Koopatrols (after you flip them with Quake Hammer), and all Wizzerd variants (since Quake Hammer can’t hit them). You can OHKO Airborne Puff variants and Arantulas with Hammer Throw, and do enough damage to a Swampire that your partner can finish them off easily. You can even use Hammer Throw or Fire Drive to set up for easy Amazy Dayzee KOs. Power Smash…well, it doesn’t have a lot of use for all the normal battles since your normal Hammer also deals 17 damage and can OHKO basically anything you attack besides Swampires and Amazy Dayzees (even Elite Wizzerds are taken out with one Hammer), but you can use it against Bonetail to deal 17 damage for less FP than Fire Drive. And whatever you don’t finish off or can’t, you can with partners, especially at Ultra Rank!

Obviously, this isn’t optimal compared to the Multibounce method for two core reasons: 1) Hazards. A lot of these attacks are slightly more prone to causing hazards to happen. If you don’t have DEF, you could cost yourself Mario’s life if he gets hit by a falling stage light, the fire crackers, etc… especially when utilizing Peril. 2) Enemy layout. Some enemy layouts are cruel to hammers, with some switching off between an aerial enemy and a grounded enemy and others starting with all enemies you want to be grounded airborne, etc… this can be especially bad with Puffs, who randomly decide to be grounded or airborne at the beginning of battle. Sometimes, you won’t be able to KO all enemies with Hammer and your partner in one turn.

These can be mitigated with Life Shrooms and other support items, and that’s where the strategy becomes unoptimal. With Multibounce, you really don’t need to worry about enemy placement; just Multibounce away with easy partner cleanup (or use Rally Wink).

Okay, let’s do at least one boss strategy with Hammers!

MAGNUS VON GRAPPLE 1.0 STRAT

10 HP, 5 FP
BADGES: Power Smash, Hammerman, Power Plus, Mega Rush (10 BP)

ITEMS: Honey Syrup, Mistake

Click here to see the strategy in action!

T1: Power Smash (25), Multibonk (5-cap) (20)
T2: Honey Syrup, Power Smash (15)
T3: Power Smash (10), Mistake (Goombella)
T4: Power Smash [KO]

This strategy revolves around Power Smash with Hammerman providing just enough ATK to give Mario 6 damage with it, which is reduced to 5 with Magnus Von Grapple’s 1 DEF. Magnus Von Grapple always Stomps Turn 1, then is triggered into summoning his X-Fists at Turn 2. We get him to his trigger Turn 1, then Goombella uses a Honey Syrup so Mario can continue Power Smashing Turn 2. Turn 3, Goombella uses a Mistake to put Mario at 2 FP so he can finish off the fight Turn 4. On Turn 3, Mario takes 3 attacks — two from the X-Fists and a Quake attack. The attacks do 4, 4, and 2 respectively. Luckily for us, Mario can get himself into Peril whether he was attacked Turn 1. Depending on how many attacks Mario guards, he can take 7, 8, or 9 damage. Because Magnus Von Grapple’s Stomp does 2 damage, we have a way to get into Peril if we’re at 8, 9, or 10 HP. Easy. Turn 4, we finish up with a Mega Rush boosted Power Smash to win the fight. It’s a nifty little strat, and I actually really like it. You could upgrade FP once or equip FP Plus so you don’t need to use items, but to be honest, it means your partner is kinda just sitting there since if they keep attacking, you can just end him before Mario goes into Peril. This strat is about Hammerman, so we want to finish with a hammer move!

And that’s it! The thing about Hammerman is that you’re not going to build a strat around it as a move like with Power Smash — it’s just a supplement to Mario’s damage, but forcing you to only use Hammer options can help you see Hammer’s strengths and weaknesses. I recommend trying it out and seeing what you come up with! As usual, feel free to use these strats or modify them for when you next play! I always say this on my streams: there’s something special and extremely satisfying seeing a strat on paper come to life in the game.I want to do something from Paper Mario 64 next time, so let me know in the comments and on social media what you’d like to see! I’ll put up a poll later this week with the answers I get.

Just Sayin’